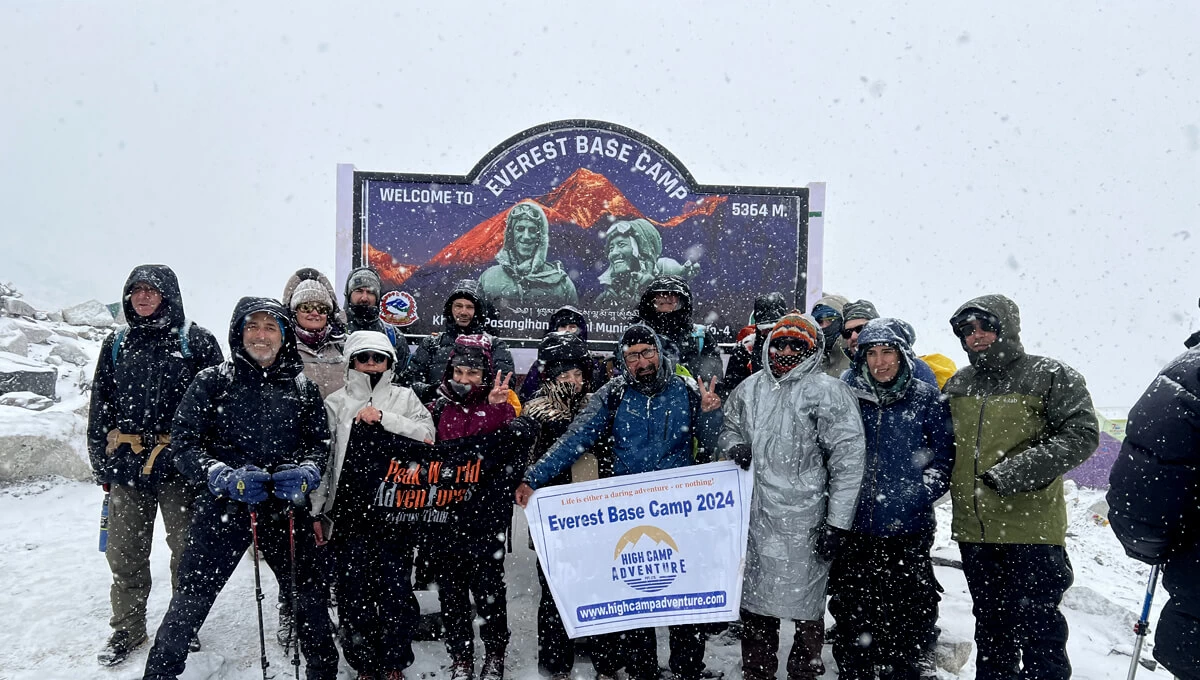
Everest Base Camp trek in April with snow-covered trail and Himalayan peaks
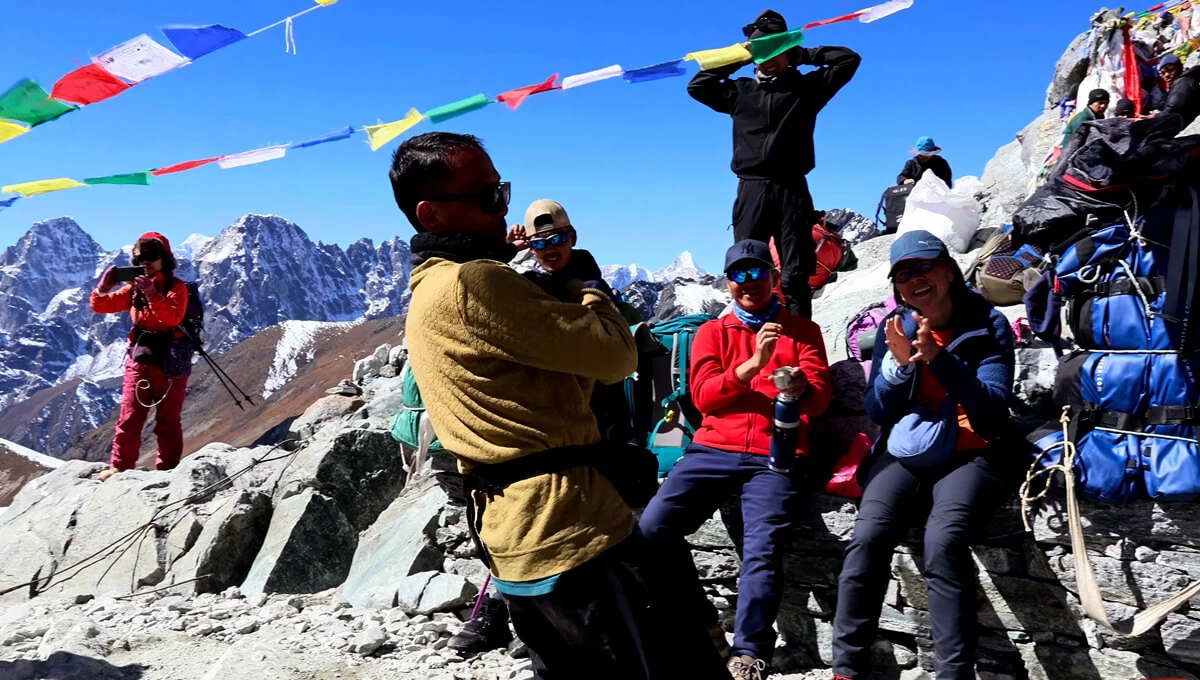
Trekkers ascending Cho La Pass on the Everest Base Camp with Gokyo Lakes trek
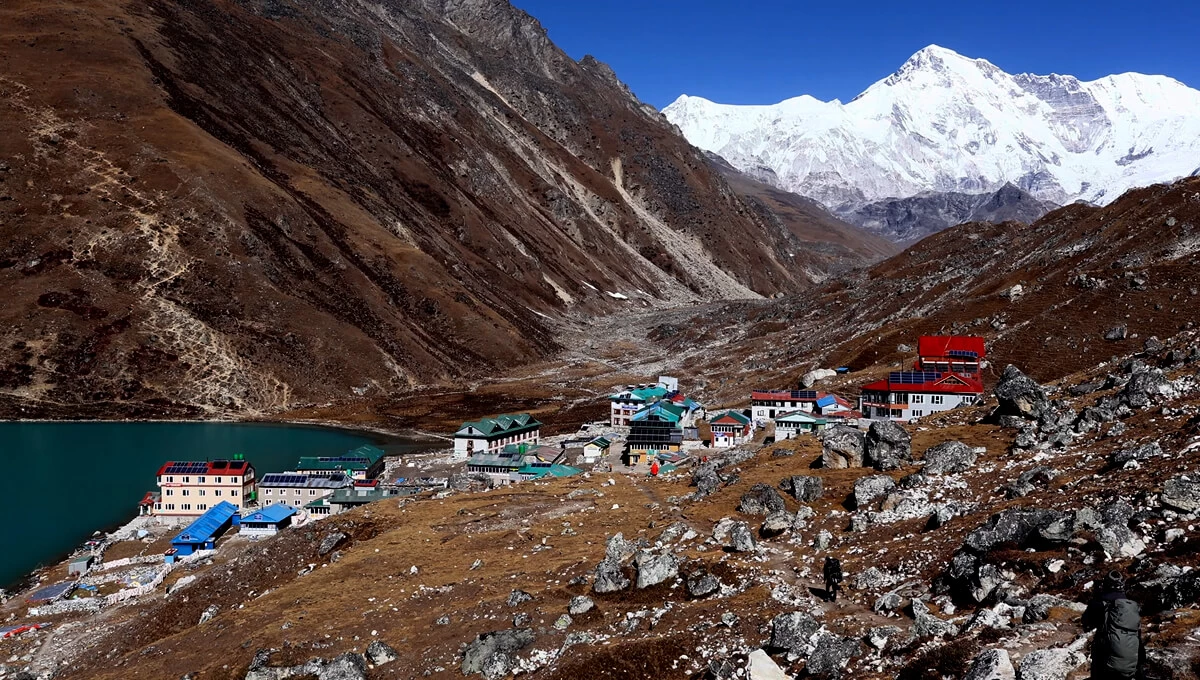
Gokyo Lake with Mount Lhotse in the background, Everest region Nepal

Everest Base Camp with Gokyo Lake Trek - 17 Days

31 reviews in Trip Advisor
11 reviews in Google Reviews
Recommended by 99% of travelers
Duration
17 Days
Trip Grade
Strenuous
Country
Nepal
Maximum Altitude
5,545 m (18,193 ft)
Group Size
1-15 Pax
Starts
Kathmandu
Ends
Kathmandu
Activities
Trekking & Hiking
Best Time
Spring (Mar - May) & Autumn (Sep - Nov)

Everest Base Camp with Gokyo Lake Trek Overview 

The Everest Base Camp with Gokyo Lake Trek combines two classic Khumbu routes into one journey. You first follow the main trail to Everest Base Camp, then continue through Dzongla and cross Cho La Pass before reaching the Gokyo Valley instead of retracing the same route. 

We run this route as a 17-day itinerary, including your arrival and final departure from Kathmandu. The actual trekking days cover a long distance and include several high-altitude sections. The highest points are Kala Patthar at 5,545 m, Gokyo Ri at 5,483 m, and Cho La Pass at 5,420 m. 

The Everest Base Camp with Gokyo Lake trek follows the familiar trail through Phakding, Namche Bazaar, Tengboche, and Dingboche before continuing towards Lobuche and Gorakshep. The walk from here reaches the popular Everest Base Camp, followed by a return after spending fulfilling moments. 

The route then takes a different direction. After an early hike to Kala Patthar, you continue towards Dzongla and prepare for the Cho La crossing. The trail starts to feel more rugged here, with short glacial sections, while nearing the pass and loose, rocky descent towards Gokyo

During the approach to Gokyo, the surrounding panoramas start to change. You have plenty of time here to watch the stunning lake and climb Gokyo Ri before descending to Machhermo and Khumjung

This EBC and Gokyo Lakes Trek is excellent for trekkers who want to spend enough time in Khumbu and can handle walking for days through high-altitude terrain. It is the most preferred option for visitors who seek to experience Everest Base Camp, Cho La Pass, Gokyo Lakes, and Gokyo Ri in one complete itinerary. 

If you are deciding between routes, our Everest Base Camp and Gokyo Lakes Trek pages can help you compare the individual experiences with this combined itinerary. The main difference is that this trek lets you experience Everest Base Camp first and Gokyo afterward, connected by one challenging high-altitude route. 

Important Highlights of Everest Base Camp with Gokyo Lake Trek 

  • Walk to the famous expedition base, Everest Base Camp (5,364 m) on the Khumbu Glacier before returning to Gorakshep for the night. 
  • Take an early morning hike to Kala Patthar (5,545 m), the highest point on the route for a close view of Mount Everest and the surrounding peaks. 
  • Cross Cho La Pass, one of the demanding high passes with rocky terrain, a short glacial section, and a descent towards the Gokyo Valley. 
  • Stand at Gokyo Lakes, a turquoise glacial lake, surrounded by high Himalayan peaks after crossing Cho La from Dzongla. 
  • Walk through Ngozumpa Glacier, which is popular as one of Nepal’s longest glaciers, as you explore the Gokyo side. 
  • Climb to Gokyo Ri (5,483 m), a short summit above Gokyo for wide views across the lakes, Ngozumpa Glacier, and the surrounding Himalayan range. 
  • Pass through the traditional Sherpa communities, such as Namche Bazaar, Khumjung, and other mountain villages while experiencing the local way of life. 

What Makes This Route Different from the Standard EBC Trek

The difference shows up after Kala Patthar. On the standard EBC trek, you continue back through the main Khumbu trail after reaching the high point of the journey. Here, the route heads towards Dzongla and Cho La before reaching Gokyo. That adds another demanding high-altitude section, but it also takes you away from the busier EBC corridor and into a quieter valley surrounded by glacial lakes and open mountain terrain. 

For us, the biggest advantage is seeing the Khumbu from two different viewpoints. From Kala Patthar, you get a close view of Everest’s summit pyramid, with Nuptse and Lhotse rising prominently around it. The Gokyo Ri gives a complete change in the view. You look across the Gokyo Lakes and Ngozumpa Glacier, with Everest and other Himalayan peaks forming the wider backdrop. 

The combined Everest Base Camp with Gokyo Lake Trek takes more time, involving longer walking days, and crossing Cho La Pass at 5,420 m. If you want the shorter and more direct way to Base Camp, standard EBC makes more sense. If you want both sides of the Khumbu and are prepared for the extra effort, adding Gokyo gives you something the standard route does not. 

How Difficult is the Everest Base Camp with Gokyo Lake Trek?

The difficulty here is not the walking hours; it is the altitude and Cho La crossing on top of several already tiring days. Most trekking days involve around 4 to 6 hours of walking, but the longer days can reach 7 to 9 hours, especially the walk from Lobuche to Everest Base Camp and the Cho La crossing. 

Altitude becomes more noticeable as you move higher. Gorakshep sits at 5,170 m, while Everest Base Camp is at 5,364 m. The early climb to Kala Patthar at 5,545 m adds another steep section before you continue towards Dzongla. By this stage, the effort of several days above 4,000 m can make even a normal walking pace feel slower. 

The Dzongla to Gokyo day is one of the hardest. You cross Cho La at 5,420 m, with a short glacier section near the pass and a loose, rocky descent towards Gokyo. The distance is around 12 km, but the terrain and altitude make it feel considerably longer than the number suggests.

You do not need to be an experienced mountaineer, but you should be comfortable walking for several hours. Along with this, being able to handle steep, uneven mountain trails is equally important. Regular hiking, uphill walking, and longer weekend walks are more useful preparation than simply relying on gym fitness.  

Is This Route a Good Fit for Your Fitness and Experience?

Choosing the Everest Base Camp with Gokyo Lake Trek can be a good choice if you want something satisfying beyond reaching the base camp. This combined trek is recommended to those who can easily manage longer walking days, stay at higher altitudes, and undoubtedly cross Cho La Pass and take a climb to the Gokyo Ri summit. If seeing both Everest Base Camp and the Gokyo Valley is important to you, this route gives you that experience without having to choose between the two. 

It is also worth knowing that this is not the easiest way to see Everest. The Everest Base Camp Trek is a better fit if you want a more straightforward route with few high-pass sections. Likewise, the Gokyo Lakes Trek may make more sense if Gokyo is your main interest and you would rather avoid the additional demands of combining both areas.

The biggest question is not whether you are an experienced trekker, but it is whether you are comfortable with this combined route or not. The days around base camp, Kala Patthar, Cho La, and Gokyo Ri can be tiring.  

Cho La Pass: What to Expect

Cho La Pass at 5,420 m is one of the most demanding parts of this trek. You normally leave Dzongla very early, often before sunrise, so the first part of the climb can be done with a headlamp. At that hour, it is usually cold, and the trail can feel quiet and exposed. 

The climb from Dzongla takes you over rocky ground towards the pass. Near the top, there is a short glacier section before the final to the pass. Conditions can vary with the season, so snow and ice can make this part more demanding. Your guide will help you judge the safest way through the section. 

The descent towards Gokyo is not necessarily easier just because you are going downhill. The trail on this side can have loose rocks, which makes it easy to lose your footing when your legs are already tired. 

Once we get below the roughest section, the trail gradually opens toward the Gokyo Valley. After the effort of crossing Cho La, seeing the valley ahead is one of those moments that makes the long day feel worthwhile. 

What Nobody Tells You About the Ngozumpa Glacier Crossing?

One thing that can surprise you about the Ngozumpa Glacier is that it may not look like the white, clean glacier you picture before the trek. Much of what you see is covered by grey rock and moraine, so at first it can look more like a huge rocky landscape than a glacier. 

It is also worth knowing that this is not the same glacier experience as the one near Cho La Pass. At Cho La Pass, the glacier section comes as part of a high pass crossing and is tied closely to climb and descent. Around Gokyo, the glacier becomes part of the wider valley landscape, with rocky moraines, glacial terrain, and lakes nearby. 

From our experience, judging the distance across this terrain from a viewpoint can be misleading. What looks relatively close can take longer to reach because the route follows the terrain rather than a straight line. We prefer keeping the pace steady and letting the guide choose the most suitable line through the changing moraine.  

That is probably the part most first-time trekkers do not expect. The glacier is not simply something you cross and tick off the itinerary. It becomes part of the landscapes around you as you move towards Gokyo. 

Everest Base Camp with Gokyo Lake Trek Cost: What Are You Actually Paying For?

The Everest Base Camp with Gokyo Lake Trek costs between US1,499 and US$1,749 per person, depending on group size. Larger groups pay less per person because some trekking and operational costs can be shared. Rather than looking only at the headline price, it is worth checking what the package actually covers and what you will pay separately. 

Group Size Price per person
1 person US$1,749
2 - 4 people US$1,649
5 - 10 people US$1,599
11 - 15 people US$1,549
16 - 20 people US$1,499

The lower per-person price for larger groups reflects shared operational costs. The overall trekking experience remains the same, but the cost is distributed among more people. 

Before booking, check the inclusions and exclusions carefully. For a trek of this itinerary, the package is only one part of your total budget. Personal expenses such as travel insurance, snacks, drinks, WiFi, charging, personal trekking equipment, and other personal purchases are normally paid separately. 

Which Season Gives You the Best Conditions for Cho La Pass?

For this route, we consider spring (March-May) and autumn (September-November) the most practical seasons. The main reason is not simply clearer skies. You need suitable conditions across several high sections, including Kala Patthar, Cho La Pass at 5,420 m, and Gokyo Ri. Autumn is generally drier after the monsoon, while spring brings warmer conditions but can still have snow around the higher parts of the route. 

Cho La is the section we pay closest attention to when checking conditions. Snow and ice around the pass can change the difficulty of the crossing, so a calendar date alone does not tell you whether the conditions will be easy. Our guides check the trail and weather conditions before crossing rather than assuming that a pass will look the same every year. 

Gokyo also changes noticeably with the season. In winter, the lakes can freeze, and the valley becomes much colder and quieter. It can suit experienced trekkers who are properly equipped for cold and snow, but we would not choose it simply because the trails are quieter. 

Monsoon (June-August) brings a different concern: rain and cloud can affect the lower trails and mountain visibility, while higher areas can be difficult to predict. If your priority is the best balance of trail conditions, mountain vistas, and a better chance of crossing Cho La, we would choose spring or autumn.  

Why Choose Us for your Everest Base Camp with Gokyo Lake Trek?

Choosing a company for a 17-day Everest Base Camp with Gokyo Lake trek comes down to more than the price. You want to know who is looking after you when the trail gets difficult, what happens when plans change, and whether your guide can make sensible decisions at altitude. 

  • Our guides understand the terrain, altitude changes, teahouses, and practical challenges along this specific route. Before heading towards Cho La, they keep track of conditions around the pass and the higher sections. 
  • We tell you the actual walking hours, altitude, harder sections, and acclimatization requirements. We would rather let you know what to expect than make the trek sound easier just to get you booked. 
  • Weather can affect Lukla flights, trail conditions, and high-pass crossings. When something changes, we explain the available options clearly and help you decide what makes sense for the situation.
  • We don’t see a rush from one stop to the next. Our guides keep a manageable pace and build in time for your body to adjust as you go higher. 
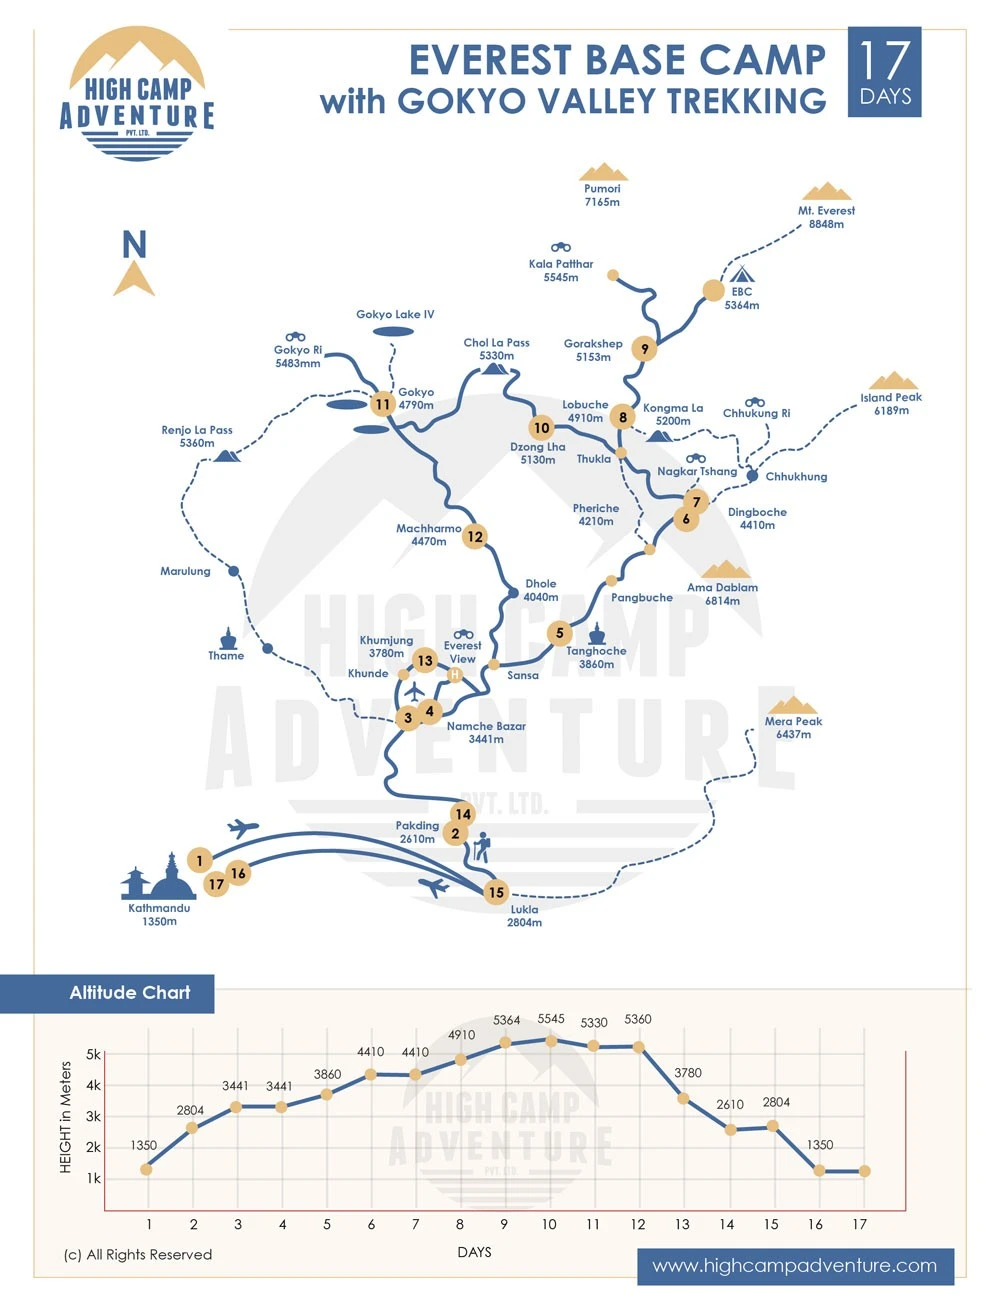
Everest Base Camp with Gokyo Lake Trek - 17 Days Itinerary

The Everest Base Camp with Gokyo Lake Trek can be fully personalized to match your pace and comfort. If you’d like to adjust the itinerary, add acclimatization days, or upgrade services, simply let us know before booking.

We’ll tailor the journey to create a smooth, comfortable, and unforgettable Himalayan experience just for you.

Start Point: Kathmandu
End Point: Kathmandu
Expand All

Your first day of the Everest Gokyo Lake Trek begins with arrival at the Tribhuvan International Airport, Kathmandu. After you complete your immigration formalities, collect your luggage, and exit the terminal. There, one of our team representatives will meet you with a warm greeting. With that, you are now transferred to your hotel accommodation in Kathmandu. Reach the hotel, check in, freshen up, and take some time to rest before thinking of exploring the area. 

Max Altitude: 1,340 m (4,397 ft)Meals: Bed & BreakfastAccommodation: Hotel

The day begins early today, as you take the first flight to Lukla, which departs in the morning, offering stable and predictable weather conditions. Depending on the current flight operation, you may travel from Kathmandu to Ramechhap Airport to Tenzing-Hillary Airport in Lukla. If your flight operates from Ramechhap, the road transfer from Kathmandu is arranged separately. 

After landing in Lukla, you have time to meet the trekking crew, organize your daypack, and prepare to walk further towards Phakding. This day’s walk covers 7 to 8 km and takes 4 to 5 hours, which fully depends on your pace and trail conditions. The initial section takes you through Lukla’s mountain town surroundings before crossing the small settlements, stone paths, sections of forests, and suspension bridges. 

On the way, you also notice the Dudh Koshi River, which makes the walk feel more relaxed. By the time you reach Phakding, the first day of walking is completed, and you can settle into the teahouse and rest.

Max Altitude: 2,612 m (8,574 ft)Meals: breakfast, lunch, & dinnerAccommodation: Teahouse

After your breakfast in Phakding, you make your trek to Namche Bazaar, which includes passing the Dudh Koshi Valley. The journey on this day covers around 10 to 11 km and usually takes 5 to 6 hours through forest paths, small townlets, and stone-paved sections. Even on the way, you need to cross several suspension bridges that enrich the way with pine and rhododendron sections. 

The trail feels much busier as you near the entrance of Sagarmatha National Park, where permits are checked before you continue. The trail climbs more consistently towards the settlement, and after several hours of walking, the ascent can feel quite noticeable. 

As you reach Namche Bazaar, one of the bustling Sherpa towns and a large mountain settlement built into the hillside. Check into your teahouse, rest, explore the nearby street if you have energy, and prepare your body for acclimatization. 

Max Altitude: 3,440 m (11,287 ft)Meals: breakfast, lunch, & dinnerAccommodation: Teahouse

Even though Day 04 is marked as an extra day for acclimatization, you still take an early morning hike to nearby viewpoints. In this way, it lets your body acclimatize to the higher areas without any challenges in the coming days. Have your breakfast first, and begin your hike towards the Everest View Hotel. This is a short climb located just above Namche Bazaar and lets you have a fulfilling opportunity to capture the beauty of Khumbu from a different perspective. 

As you reach Everest View Hotel, you have enough time to stop, enjoy a nourishing breakfast if you want, and take a sip of coffee, while appreciating the mountains behind you. This point provides you with clear sights of Mount Everest, Lhotse, Tharserku, Ama Dablam, and surrounding peaks. 

After a productive time here, start your return to Namche the same way you took before. Even Namche has a lot more to explore, as you simply stroll around the narrow streets, spend time at the local cafes, and get well-rested.

Max Altitude: 3,440 m (11,287 ft)Meals: breakfast, lunch, & dinnerAccommodation: Teahouse

After breakfast, you leave Namche Bazaar and walk around 9 to 10 km and reach Tengboche. The journey on this day feels much more relaxed, as the route takes you along the hillside and treats you to some of the excellent vistas of Everest, Lhotse, Ama Dablam, and Thamserku during clear weather. 

The trail now climbs as you get deeper into the Khumbu region. You need to cross forested sections, small settlements, and a path that keeps on rising as you continue higher. As you trek for 4 to 5 hours at a steady pace, you reach Tengboche, as the landscape starts to open up and the first view you get to see is of the beautiful Tengboche Monastery.  

Max Altitude: 3,860 m (12,665 ft)Meals: breakfast, lunch, & dinnerAccommodation: Teahouse

As you move from Tengboche, the trail now gradually takes you deeper into the Khumbu region. The first part of the route descends through woodland, where you cross the river before beginning your steady climb towards Pangboche. The moment you gain elevation, the dense forests change into more open scenery with wider mountain views. 

Throughout the way, you get to see the striking presence of the Ama Dablam mountain. The final approach to Dingboche involves a steady climb, and at this altitude you may notice that your normal walking pace no longer feels quite as easy. 

Take this walk slowly, drink enough water, and give yourself time to rest and relax. After that, head directly towards Dingboche, which is truly another important place that serves as a resting place before heading towards higher sections.

Max Altitude: 4,340 m (14,239 ft)Meals: breakfast, lunch, & dinnerAccommodation: Teahouse

Today is kept as an extra day for acclimatization here in Dingboche. After breakfast, you can take a short hike towards Nangkartshang Peak, offering a great sense of peace as you appreciate the wider vistas of the Himalayan panoramas. But, firstly, be sure to maintain a constant walking pace with frequent stops on the way. 

With enough time to spend here, you now return towards Dingboche and continue your exploration towards Chhukung Valley. The landscape from here starts to get open and rugged, with impressive sights of the surrounding peaks that are towering from a distance. After exploring, you now retrace to Dingboche for a relaxing afternoon. Get proper rest and spend your time with the Sherpa locals. 

Max Altitude: 4,340 m (14,239 ft)Meals: breakfast, lunch, & dinnerAccommodation: Teahouse

On day 08, you leave Dingboche after a fulfilling breakfast. This day’s trek covers 8 km, taking you to 5,000 meters altitude, where the air gets thinner, and the uphill climbs can feel tiring. As you move further, the open and rugged scenery makes its way to Lobuche. 

The rocky slopes, green vegetation, alpine terrain, and wider angle of the surrounding peaks is seen throughout the way. The route crosses through Dhukla before climbing towards the memorial area, which is a respected area and fully dedicated to climbers and mountaineers who lost their lives in the Everest Summit. 

From this point, the surroundings become quieter and more exposed. You can feel the altitude more clearly, so keeping a slow, consistent pace is much more useful than trying to cover the 8 km quickly. You then reach Lobuche, where the landscape feels different from the lower Khumbu villages. 

Max Altitude: 4,940 m (16,208 ft)Meals: breakfast, lunch, & dinnerAccommodation: Teahouse

This day begins early in Lobuche, as you prepare to head towards Gorakshep first and then walk to Everest Base Camp. The route covers around 12 to 14 km in total and usually takes 7 to 9 hours, which includes most of the rocky and uneven section with barren surroundings. Reaching such elevation, the distance can feel considerably harder than what you took in the initial days. 

The trail follows the valleys towards Gorakshep, with breathtaking vistas of the surrounding peaks and glacial terrain that starts to open up. After reaching Gorakshep, you take a short break and continue toward Everest Base Camp at 5,364 m. From here, the trail crosses through rocky ground alongside the Khumbu Glacier. 

The moment you stand at the Everest Base Camp, it is worth remembering, mainly for first-time trekkers. The base camp is full of climbers who are preparing for the Everest summit, mainly during spring and autumn. After spending some time here, you retrace towards Gorakshep. By this time, the return walk feels more or less tiring. Once back at the teahouse, have proper meals, drink enough water, and get some rest. 

Max Altitude: 5,364 m (17,864 ft)Meals: breakfast, lunch, & dinnerAccommodation: Teahouse

The morning starts early today because you make a short hike towards Kala Patthar from Gorakshep. The distance from here is not too long, but the altitude makes all the difference, especially after a long walk to the base camp yesterday. You will be passing over rocky sections, which may require trekkers to have a steady pace rather than rushing. Standing at the top, you see clear sights of Mount Everest, Nuptse, Pumori, and other towering mountains that are lying at a distance. 

With enough time at Kala Patthar, you now begin your descent to Gorakshep for breakfast and a short rest before starting your trek towards Dzongla. The route now takes a different direction towards Dzongla, as from this day onwards, you leave the main Everest Base Camp route. 

The walk towards Dzongla is around 12 to 14 km, which takes 5 to 6 hours. As you reach Dzongla, let yourself get enough rest at the teahouse, eat well, and prepare before crossing the high-mountain pass. 

Max Altitude: 5,545 M (18,192 ft)Meals: breakfast, lunch, & dinnerAccommodation: Teahouse

After an early morning breakfast from Dzongla, today marks the toughest yet most scenic sections of the journey. As you begin your trek, the terrain starts to feel more rugged than what you felt at lower sections, and the altitude means you need to keep a steady pace. 

The route includes a mix of rocky and exposed surroundings that can be dangerous. Some sections can be covered with ice and snow, making footing essential. From Cho La Pass, you take in the surrounding high Himalayan panoramas before you begin your descent towards the other side. 

By the time you reach Gokyo Valley, the change in the scenery can easily be noticed. After crossing the challenging climb, the descent feels much more relaxed. Check into the teahouse, drink enough water, and rest your legs.

Max Altitude: 5,420 M (17,782 ft)Meals: breakfast, lunch, & dinnerAccommodation: Teahouse

On day 12, you commence on a short morning hike towards Gokyo Ri, which is located at 5,483 meters. After yesterday’s Cho La crossing, your legs may still feel tired, but the climb is worth taking steadily. The trail rises above the village, and as you gain height, the views across the Gokyo Lakes, Ngozumpa Glacier, and nearby Himalayan peaks become wider. 

From Gokyo Ri, the view opens across the Gokyo Lakes and Ngozumpa Glacier, while Everest, Lhotse and Makalu appear across the wider skyline. You get to spend some time at Gokyo Ri and take in the mountain views before descending towards Gokyo. You can have your breakfast and take a short break before continuing the walk towards Machhermo. 

After enough rest, you start your journey towards Machhermo. This day gives you a chance to recover while still reminding you that the Himalayan environment still follows you.

Max Altitude: 5,483 M (17,989 ft)Meals: breakfast, lunch, & dinnerAccommodation: Teahouse

After breakfast in Machhermo, you begin the descent toward Khumjung. After challenging days around Cho La and Gokyo Ri, the lower sections feel much more comfortable, and walking feels easier as you lose altitude. The trail on this day proceeds through open mountain terrain before turning into a greener and more vibrant area. 

Trekking from Machhermo to Khumjung provides the opportunity to look back towards the mountains and appreciate how far you have traveled since entering the higher Khumbu region. As you approach Khumjung, the trail becomes much more familiar with stone-built homes, cultivated land, and a more settled atmosphere. 

Khumjung is one of the traditional Sherpa villages in the region. As you arrive here, check into the teahouse and take the afternoon to rest and explore the village at an easy pace. 

Max Altitude: 3,790 M (12,435 ft)Meals: breakfast, lunch, & dinnerAccommodation: Teahouse

On day 14, you will be making your way from Khumjung and heading to Phakding. After crossing the higher sections around Cho La, Gokyo Ri, and Kala Patthar, the lower elevation makes the walking feel much easier. The trail passes through greener surroundings as you lose altitude. 

You will be walking through the traditional villages, forested sections, and familiar sections of the Khumbu route. Along the way, you get plenty of ups and downs sections, so don’t just assume that descending in such altitude conditions is easier. Near Phakding, you notice how different the trail feels, compared with high, rocky terrain. 

After 5 to 6 hours, you reach Phakding, where you can settle into the teahouse and enjoy a relaxing evening. This is a good time to rest your legs and prepare for your final day of trekking.

Max Altitude: 2,610 m (8,563 ft)Meals: breakfast, lunch, & dinnerAccommodation: Teahouse

Day 15 is your final day of trekking, as you make your way from Phakding towards Lukla. The walk involves several gentle climbs and descents. This day’s trek feels much more familiar as you cross the sections of the Dudh Koshi Valley. It passes through small settlements, forested areas, stone paths, and suspension bridges along the way. 

As you get closer to Lukla, the trail becomes busier with trekkers heading their way towards Phakding. Reach Lukla, as this marks the end of the trekking portion of your journey.

Max Altitude: 2,860 M (9,384 ft)Meals: breakfast, lunch, & dinnerAccommodation: Teahouse

After breakfast in Lukla, you head to Tenzing-Hillary Airport for your morning flight back towards Ramechhap or Kathmandu. This depends on the current flight operation. The flight itself takes around 30-35 minutes, which gives you a comfortable option to fly from the mountain landscape to the capital city. 

The flight from Lukla can feel quite different from the journey at the beginning of the trek. You have now spent more than two weeks walking through the Khumbu, so seeing the villages, valleys, and mountain terrain from the air gives you a chance to appreciate the route you have completed. 

If the flight operates to Ramechhap, you will continue by road to Kathmandu rather than flying directly into the capital. Once you reach Kathmandu, you will be transferred to your hotel and spend the time resting, freshening up, and simply enjoying some free time in the city. 

Max Altitude: 1,340 m (4,397 ft)Meals: Bed & BreakfastAccommodation: Hotel

Your Everest Base Camp with Gokyo Trek comes to an end today. After breakfast at your hotel, take some time to check your belongings and make sure you have your passport, flight documents, and other essentials ready before leaving. Our team will arrange your transfer from the hotel to the airport and help make the final part of your trip easier and more convenient.

Meals: Breakfast
Let us help You Plan Your Perfect Holiday
Looking for a customized trip? Let us know your estimated holiday time, budget, travel style, etc. We will design an amazing personalized itinerary for you.

Route Map

Everest Gokyo Lake Trek Route Map

Cost Details

Includes

  • Pickup and drop-off between Tribhuvan International Airport and your hotel accommodation in Kathmandu. 
  • Hotel accommodation in Kathmandu, including breakfast. 
  • Domestic flight between Kathmandu/ Ramechhap - Lukla - Kathmandu/ Ramechhap. 
  • Comfortable mountain teahouse accommodation throughout the trekking route. 
  • Delicious and fulfilling breakfast, lunch, and dinner during the trek. 
  • An experienced, Government-licensed guide to lead and assist you throughout the trek. 
  • Porter service to carry your main trekking luggage. 
  • Guide and porter expenses such as meals, accommodation, salary, and necessary expenses during the trek. 
  • Khumbu Pasang Lhamu Rural Municipality Area Permit. 
  • Sagarmatha National Park Area Permit.
  • Trekking equipment such as trekking poles, sleeping bag, and a down jacket (should be returned at the end)
  • Company’s Duffle Bag
  • Trekking Map 
  • First-aid Kit. 
  • Applicable government taxes and service charges included in the package. 
  • Farewell dinner in Kathmandu.

Excludes

  • International flight tickets to and from Nepal are not included in the trekking package. 
  • Nepal Entry Visa 
  • Personal trekking items like clothing, high-quality trekking boots, warm gloves, and other necessary items. 
  • Tips for your guide, porters, drivers, and other supporting staff. 
  • Hot showers, laundry, electronic charging, and other optional services may cost extra depending on the teahouse. 
  • Internet access, phone service, battery charging, and other communication services at teahouses. 
  • Costs caused by unexpected delays such as Weather, flight disruptions, trail conditions, illness, or other circumstances. 
  • Travel insurance that includes emergency helicopter evacuation, medical treatment, trip cancellation, and high-altitude trekking. 

Dates & Availability

Please take a look at our fixed departure dates for this trek. If they do not fit with your schedule, then please let us arrange an itinerary that is more suitable to you and your requirements. 

Essential Information

Lukla Flight: What to Expect 

Lukla flights only take 30 to 35 minutes, but don’t count on that schedule holding. Clouds, winds, or poor visibility can push the flight back by hours, or bump it to the next day entirely. During spring and autumn, when most trekkers are there, the flights usually don’t leave from Kathmandu at all. They fly out from Ramechhap instead, which means a 4- to 5-hour drive out of the city is arranged. Ramechhap sits below the cloud line that causes most of Kathmandu’s delays, so flights here tend to take off on time. 

If your flight is delayed, we work with the airline to arrange the next available option and adjust the itinerary where possible. A helicopter may even be considered when the time is limited, but it is subject to weather, availability, and additional cost. Therefore, we recommend keeping at least one or two extra days before your international departure so a delayed Lukla flight does not put your journey at risk. 

Accommodation on the Trek

Accommodation on the Everest Base Camp with Gokyo Lake Trek is mainly in teahouses and mountain lodges. Around Namche, the rooms are generally comfortable, and facilities are easier to find. Once you climb past Lobuche, Gorakshep, Dzongla, and Gokyo, the rooms get pretty basic. 

Most teahouses provide simple twin-sharing rooms with beds, mattresses, blankets, and pillows. Bathrooms are often shared, particularly at higher elevations, although some do have attached bathrooms as well. The dining hall is usually the warmest place in the lodge, with a stove used during the evening, while bedrooms generally do not have heating facilities. 

The rooms are basic, not luxurious, and honestly that’s all you need after a long day of walking. A warm dining room, a simple bed, and somewhere to lie down. 

Is Gokyo Lake Worth Adding to Everest Base Camp?

If you already plan to visit Everest Base Camp, we think Gokyo Lake is worth adding if you have the extra time and fitness. It makes the trek longer, but you also experience a different side of the Khumbu instead of simply returning by the same route. 

After Everest Base Camp and Kala Patthar, the trail heads towards Dzongla and Cho La Pass. This is where the trek becomes more demanding. The early morning sections around Cho La can be icy, and the rocky descent needs careful footing, especially after several days at high altitude. 

Once you reach the Gokyo Valley, the surroundings feel different. The landscape becomes more open, and the Gokyo Lakes and surrounding peaks give you a completely different setting from Gorakshep. The hike to Gokyo Ri adds another viewpoint and is one of the parts we find particularly worthwhile. 

We would not suggest Gokyo to everyone. If you want a shorter Everest Base Camp trek, the standard route is a better choice. But if you have the time and want to see more of the Khumbu, combining Everest Base Camp with Gokyo gives you a much more varied trekking experience. 

Permits Required for Everest Base Camp with Gokyo Lake Trek?

You need the required trekking permits before starting the Everest Base Camp and Gokyo Lake Trek. The Sagarmatha National Park Entry Permit and the Khumbu Pasang Lhamu Rural Municipality Permit are the necessary ones to be obtained from Kathmandu. 

The entire Everest and Gokyo route lies within the Sagarmatha National Park, so you need a park entry permit before entering the protected area. Another one is the Khumbu Pasang Lhamu Rural Municipality, where the applicable local entry fee is required. The Nepal Tourism Board currently lists the relevant Solukhumbu local permit fees at US$20 per person for the first four weeks. 

We arrange the required permits before and during the trek as needed. With these ones, carrying your passport and the documents is equally necessary, as it is checked at different points along the route. 

What We Recommend Packing for EBC and Gokyo Valley 

You do not need to carry everything you own for doing the Everest Base Camp with Gokyo Lake Trek. The main idea is to pack in layers so you can adjust easily as the temperature changes from the lower valleys to Everest Base Camp, Cho La, Kala Patthar, and Gokyo Ri. 

Upper Body 

  • 2-3 moisture-wicking thermal or quick-dry shirts. 
  • 2-3 lightweight shirts for the warmer lower sections. 
  • 1 warm fleece layer for cold mornings and evenings. 
  • 1 good-quality down jacket for the high-altitude sections. 
  • 1 waterproof and windproof outer shell to protect from rain, snow, and strong wind. 
  • 1 lightweight jacket for lower elevation.

Lower Body 

  • 2-3 comfortable, quick-drying trekking pants. 
  • 1-2 pairs for cold nights and higher elevations. 
  • 1 warm pair for sleeping and very cold conditions. 
  • 1 pair for rain, snow, and windy conditions. 
  • 1 pair can be useful in the warmer lower sections if you prefer them. 

Footwear 

  • 1 pair of comfortable, waterproof boots with good grip. 
  • 1 lightweight pair of sandals or comfortable shoes for use around the teahouse. 
  • 4-6 pairs of comfortable trekking socks. 
  • 2-3 pairs of thicker wool or thermal socks for colder nights. 
  • Gaiters can be useful in snow, mud, or wet trail conditions, especially around Cho La. 

Head and Hand Protection 

  • 1 fleece or wool hat for cold mornings and evenings. 
  • 1 cap or hat for protection from strong sunlight. 
  • 1 lightweight pair for everyday trekking. 
  • 1 warm pair for early mornings and high-altitude sections. 
  • 1 buff or neck warmer for cold winds and dust 

Sleeping Gear 

  • 1 warm sleeping bag that is suitable for cold high-altitude nights. 
  • Sleeping bag liner 

Backpack and Bags

  • 1 comfortable backpack for carrying daily essentials. 
  • 1 larger bag for the belongings carried by your porter.
  • 1 waterproof cover for your daypack.
  • Small waist bag, options for keeping your phone, money, passport, or other small items. 

Trekking Accessories

  • Trekking poles, useful for steep climbs, rocky descents, and the Cho La section. 
  • Headlamp - important for early morning hikes to Kala Patthar and Gokyo Ri. 
  • Water purification tablets. 
  • Travel adapter - useful for charging electronic devices. 

Sun and Skin Protection 

  • UV-protection sunglasses suitable for strong high-altitude sunlight.
  • Sunscreen with SPF 
  • A moisturizing lip balm with sun protection for dry and windy conditions. 

Toiletries and Personal Care

  • Toothbrush and toothpaste 
  • Hand sanitizer, useful when soap and running water are not available 
  • Quick-drying towel 
  • Toilet paper 
  • Personal hygiene products 

First Aid and Medication 

  • Personal medication that you take regularly
  • Basic First-Aid Kit that includes supplies for minor cuts, blisters, and other small injuries. 
  • Blister treatment
  • Pain relief medication
  • Altitude medication 

Drinking Water and Food along the Trail

Around Namche Bazaar, food choices are still varied, with teahouses offering dal bhat, noodles, pasta, rice dishes, soups, eggs, bread, and snacks. As you climb towards Lobuche, Gorakshep, Dzongla, and Gokyo, menus become simpler, and some items may not always be available. We recommend sticking with meals you already know suit you rather than chasing variety once you are higher up. 

You can refill bottles at teahouses along the way. Just make sure it’s boiled or properly purified before you drink it. Bottled water is around too, but it gets pricier the higher you climb. It is worth packing purification tablets or a filter as backup, just in case. 

  • Dal Bhat: Rice, lentils, and vegetables. A filling and practical meal during long trekking days. 
  • Noodles and Pasta: Common alternative when you want something different from rice. 
  • Soups and Thukpa: Warm options that work well on cold evenings, especially at higher elevation.
  • Breakfast: Eggs, porridge, bread, toast, pancakes, and hot drinks are commonly available. 
  • Water Refills: You can arrange boiled drinking water at teahouses or use a suitable purification method before drinking untreated water. 
  • Bottled water: Available along the route, although prices generally rise at higher elevations. 
  • Daily Fluids: We recommend drinking roughly 3 to 4 litres of water each day, adjusting for your walking effort and conditions. 

Common Mistakes First-Time Trekkers during Everest Base Camp with Gokyo Lake Trek

The biggest mistake we see is not about fitness; it’s pace. This Everest Base Camp with Gokyo Lake Trek route gives you time to reach high altitude, but rushing early can leave you tired when the harder sections arrive. Below are some of the common mistakes that we have noticed many first-time travelers make while doing the Everest and Gokyo Lakes Trek. 

  • Trying to keep up with faster trekkers in the first few days, or comparing how you feel to how they feel, is a common mistake. People respond to altitude differently, and the trekkers moving faster beside you may be adjusting completely differently to the same elevation. Therefore, a steady pace you can sustain matters more than keeping up. 
  • The hikes around Namche and Dingboche are part of the acclimatization plan. Skipping them means losing an important chance to let your body adjust before going higher. 
  • We have seen many trekkers focus on reaching the 5,420 m pass and forget that the descent towards Gokyo can involve loose, uneven terrain. As a result, it requires careful footing. 
  • EBC is not the end of this route. You still have Kala Patthar, Dzongla, Cho La, Gokyo Ri, and several trekking days ahead, so pacing your energy matters throughout. 
  • Carrying unnecessary clothing and equipment becomes more noticeable on long uphill sections. Pack for the conditions and carry what you genuinely expect to use. 

Altitude Sickness and Acclimatization on This Route 

Altitude is one of the main things we take seriously on the Everest Base Camp with Gokyo Lake route. You spend several days climbing from Namche at 3,440 m to Dingboche at 4,340 m, and then reach much higher points around. The acclimatization days are there for a reason, so we do not recommend rushing through them. 

What Symptoms Should You Watch For?

Mild altitude sickness can include headache, nausea, dizziness, tiredness, loss of appetite, and difficulty sleeping. These symptoms should not simply be ignored if they are getting worse. 

More serious symptoms, such as difficulty breathing at rest, confusion, inability to walk normally, or severe worsening, require immediate attention. At high altitude, continuing upwards when someone is becoming seriously unwell can be dangerous. 

How We Handle Acclimatization 

  • Namche Acclimatization: We use the rest day for a short hike around Everest View Hotel before returning to Namche. 
  • Dingboche Acclimatization: The second acclimatization day includes a gradual hike towards the surrounding hills, Nagarjun Peak, or Chhukung depending on the itinerary and condition. 
  • Our guides monitor how trekkers are coping and will recommend stopping or descending if symptoms worsen. Medical decisions should be made with qualified medical professionals when available.
  • Reaching the next destination is not the priority here. If symptoms worsen, we would rather stop heading further, but immediately descend. 
  • If things get serious, our team arranges evacuation or gets you to whatever medical support is available in the region. 

Travel Insurance and Emergency Evacuation

Get travel insurance for the Everest Base Camp with Gokyo Lake Trek and make sure it actually covers high-altitude trekking and helicopter evacuation, not just the standard stuff. Check the altitude limit on your policy too. This route hits 5,545 m at Kala Patthar, and both Cho La Pass and Gokyo Ri above 5,400 m, which is higher than a lot of policies are written for. 

You also want coverage for medical treatment, trip cancellation, and delays. If something serious happens on the trail, whether it’s medical or altitude-related, our team helps coordinate evacuation and works with the local services. 

Before traveling, keep your insurance policy details and emergency contact information accessible. We also recommend checking the policy carefully rather than just assuming that standard travel insurance automatically covers trekking at these elevations.

Everest Base Camp with Gokyo Lake Trek - 17 Days FAQs

Our Everest Base Camp Gokyo Lake trek runs for 17 days. This includes arrival and departure from Kathmandu. The route covers Everest Base Camp, Kala Patthar, Cho La Pass at 5,420 m, Gokyo Lakes, and Gokyo Ri before returning towards Lukla.

A guide is strongly recommended for this route, mainly because of Cho La Pass and other high-altitude sections. A local Sherpa guide helps with navigation, pacing, and accommodation, and can read changing trail conditions, which matters a lot when weather changes.

You need the Sagarmatha National Park Entry Permit and Khumbu Pasang Lhamu Rural Municipality permit for this trek. As the route passes through local areas, this is why you need local registration done before entering this region. 

No, since October 2018, trekking regulations have ensured that the Everest Base Camp trek does not require a TIMS Card. Instead, you need the Khumbu Pasang Lhamu Rural Municipality Permit. 

Spring (March to May) and autumn (September to November) are the seasons we point you towards. The trails are in better shape, and you get a much better shot of those big mountain panorams. Cho La is the exception, though it can bring snow and rough weather even in good months.

Absolutely. If you've got the extra time and don’t mind a longer, tougher route. Gokyo Ri and the lakes are worth it. But if you just want the shortest, simplest way to Base Camp, skip it; this is not the route you should be taking.

The package covers everything in the itinerary - airport transfers, domestic flights, teahouse stays, meals on the trail, your guide and porters, and all the required permits.

The best thing you can do is take it slow. Stick to the acclimatization days, keep a comfortable pace, drink plenty of water, and tell your guide the moment something feels off. Even being fit can be helpful, but it won’t protect you from altitude sickness.

The pricing runs from US$1,499 to US$1,749 per person, depending on the group size. Solo trekkers pay US$1,749, groups of 2-4 pay US$1,649, 5-10 pay US$1,599, 11-15 pay US$1,549, and 16-20 pay US$1,499. Therefore, the bigger the group, the lower the per-person cost.

Beginners can do the trek if they are physically prepared for long walking days and high-altitude conditions. Previous high-altitude trekking experience is helpful but not essential. However, this is not the easiest first trek because the route includes Kala Patthar, Gokyo Ri, and Cho La Pass at 5,420 m.

The highest point of the Everest Base Camp with Gokyo Lake Trek is Kala Patthar at 5,545 m, although Cho La Pass reaches 5,420 m, and Gokyo Ri at 5,483 m. Kala Patthar is reached during the early-morning hike from Gorakshep and is one of the highest walking points on the itinerary.

Cho La can turn dangerous fast in bad weather or icy conditions, but it’s manageable to cross when conditions are right. Expect steep terrain, a short glacier section, and a loose, rocky descent down towards Gokyo.

Yes. The Gokyo Lakes usually freeze through the winter months, from December to February. Here, you can expect colder nights and snow or ice around the higher sections, including Cho La Pass.

Yes, you can. But the conditions at this time can be colder, and the higher sections can become more difficult. The Gokyo Lakes freeze from around December to February, while snow and ice can affect Cho La Pass.

What Our Guests Say?

Need Help? Call Us+977 9851031822